
Install a theme on RDS 2022
Back up the default files and install a Quick Theme on RD Web Access and the RD Web Client on RDS 2022.
This page shows how to install a Quick Theme on Remote Desktop Services (RDS) 2022. It covers both RD Web Access and the RD Web Client.
Your theme download includes a PDF install guide with the same steps. Follow the PDF guide during installation and use this page as a quick reference.
Before you begin#
- Download your theme package (a ZIP file) for RDS 2022. Themes are version specific, so a theme for another RDS version won't work.
- Sign in to the RD Web Access server with an account that can change files in
C:\Windows\Web\RDWeb\and use IIS Manager.
Install the theme on RD Web Access#
Back up the default RD Web Access files#
Make a backup first, so you can restore the default RD Web Access interface if anything goes wrong.
- On your RD Web Access 2022 server, open
C:\Windows\Web\RDWeb\. - Copy the
Pagesfolder to a safe place on the server or on your network.
Copy the theme files#
- Unzip your theme package.
- Open the
Custom-Theme\RDWeb\Pages\folder. -
Select the folder of each language you use (for example
en-US), and the filesCustomScript.jsandSiteLayout.xsl.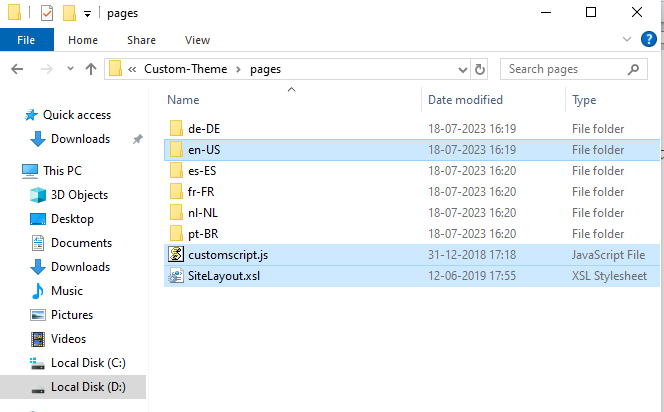
-
Copy the selected folders and files.
- Open
C:\Windows\Web\RDWeb\Pages\. -
Paste the folders and files. If Windows asks about files with the same name, select Copy and Replace.
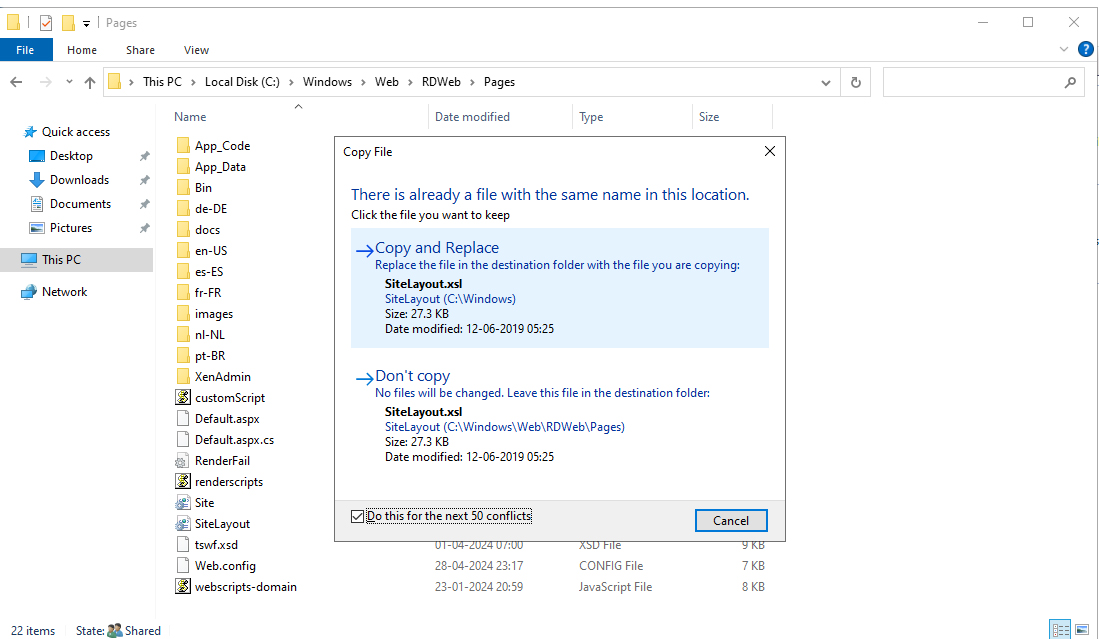
Open your RD Web Access URL in a browser. You see the new theme.
Install the theme on the RD Web Client#
Back up the default Web Client files#
- On your RD Web server, open Internet Information Services (IIS) Manager.
- Expand your RD Web site or virtual application (for example Default Web Site > RDWeb).
-
Right-click webclient and select Explore.
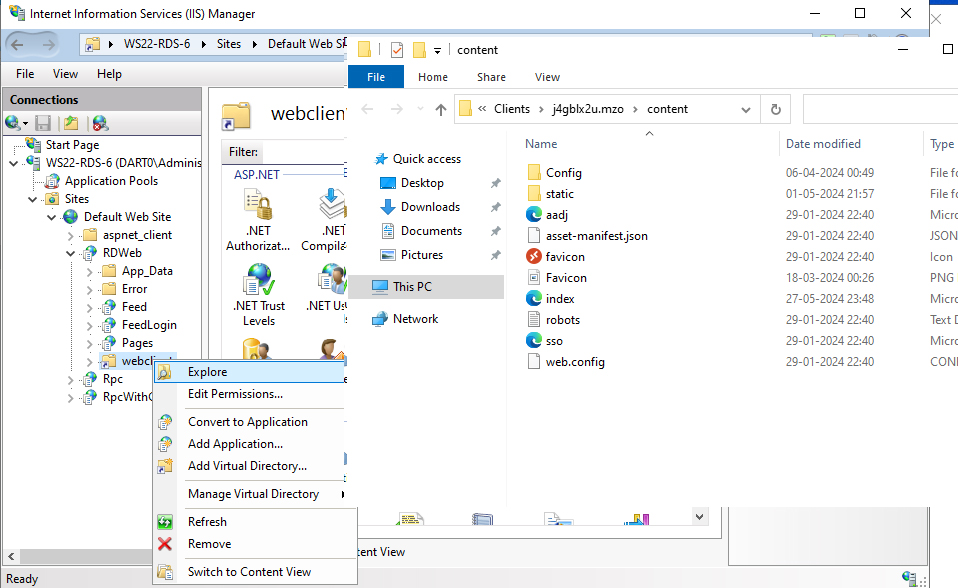
File Explorer opens the Web Client's
contentfolder. -
Select all the files and folders, and copy them to a safe place.
Note
Open the Web Client folder from IIS Manager as shown above. The top-level Web Client folders are protected, so you can't browse to the content folder in File Explorer.
Copy the theme files#
- In your unzipped theme package, open the
WebClient\Contentfolder. - Select all the files and folders, and copy them.
- Go back to the Web Client
contentfolder you opened from IIS Manager. -
Paste the files and folders. When Windows asks, replace all the files in the destination.
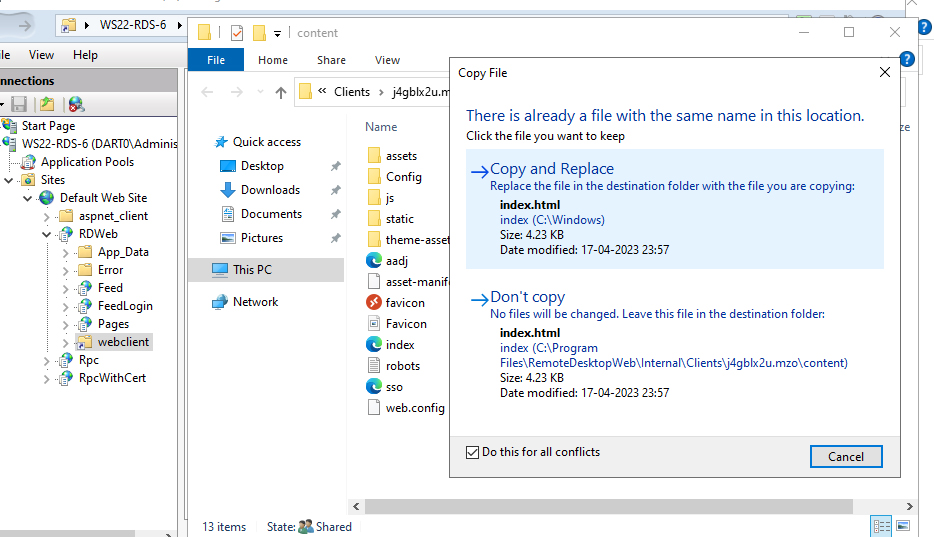
Open the RD Web Client in a browser. You see the new theme.
Troubleshooting#
- Windows is on a different drive. This guide uses
C:\because it is the most common system drive. If Windows is installed on another drive, use that drive letter instead. - Your changes don't show in the browser. This is usually the browser cache. Do a hard refresh or clear the browser cache, then reload the page.
- Something went wrong. Restore the backup of the default files you made before installing. Always back up the default interface files before you install a theme, customize it or apply an update.