Getting Started with AD Web
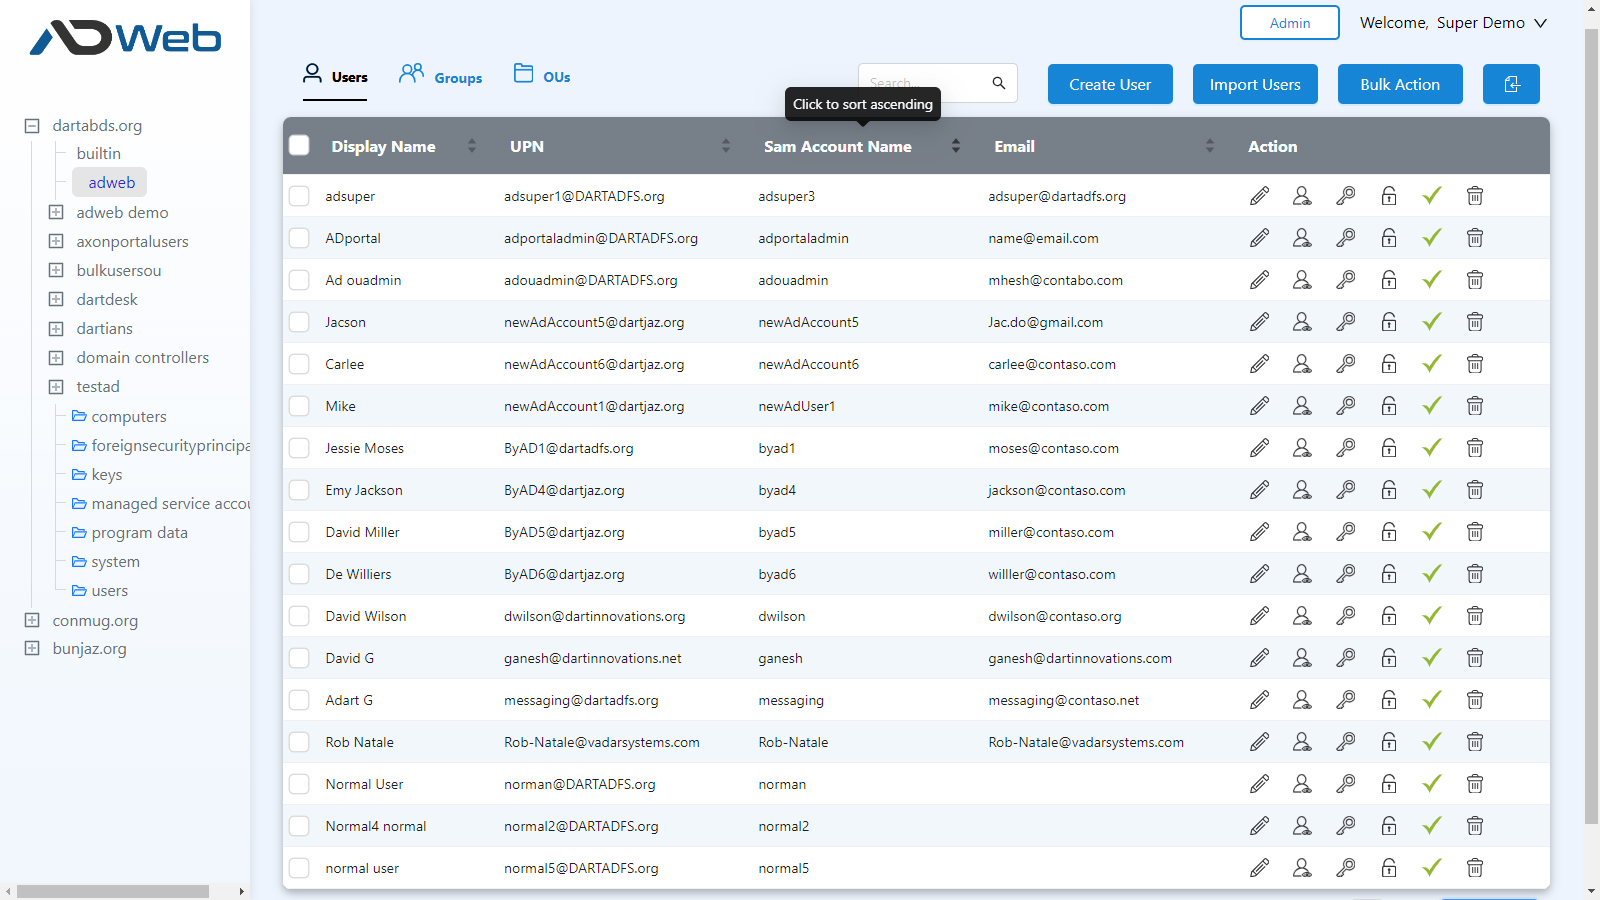
Once logged in you will be landing at dashboard where you will see the Tree view on left with grouped Tab view for Users, Groups and OUs.
Explorer:
The explorer at left appears with all your AD Domain you have access to and allows you to navigate between domains and OUs. The tree view gives you clear visibility of where you are.
Search:
The search bar at top lets you search and find objects in a flash. This is a full text search so you can use any field to search and find an object. For example, email, SAM name, Display name etc.
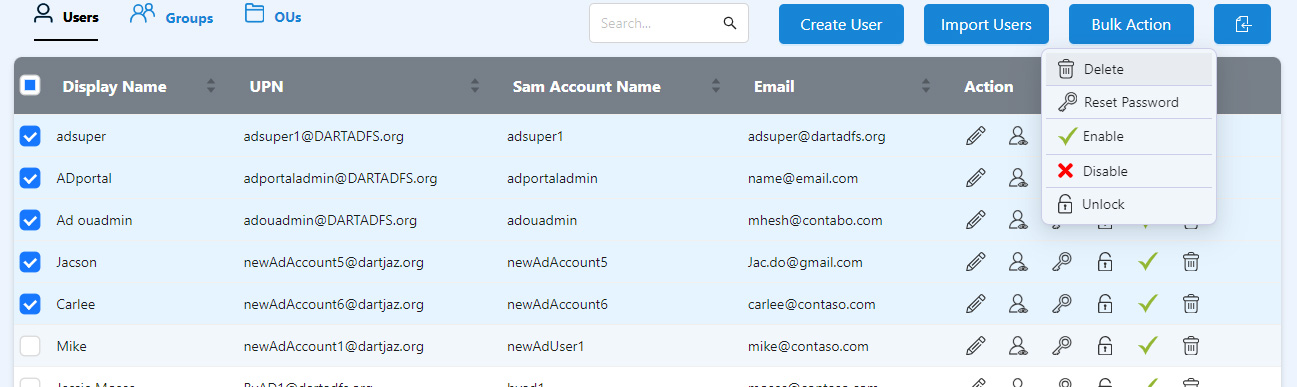
Users and Actions:
You can View, Edit or Delete an user using the Action buttons at the right displayed in each row. The locked users are shown with Locked status which you can unlock by simply clicking on. You can disable/enable users using the Green tick icons. The Reset Password icon let you quickly reset your user password in 3 ways.
Reset User Password:
Random Password (Method 1)
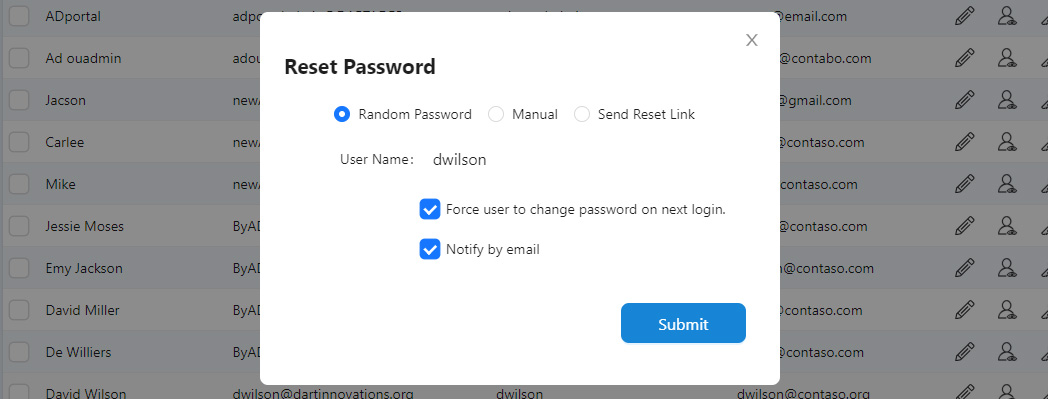
The password is generated randomly and sent user via email. You can uncheck the notification if you don’t want to send it by email for the cases like creating service accounts etc. You can also Force the user to change password on next login. The random password generation rule can be configured at Admin >> Settings
Random Password (Method 2)
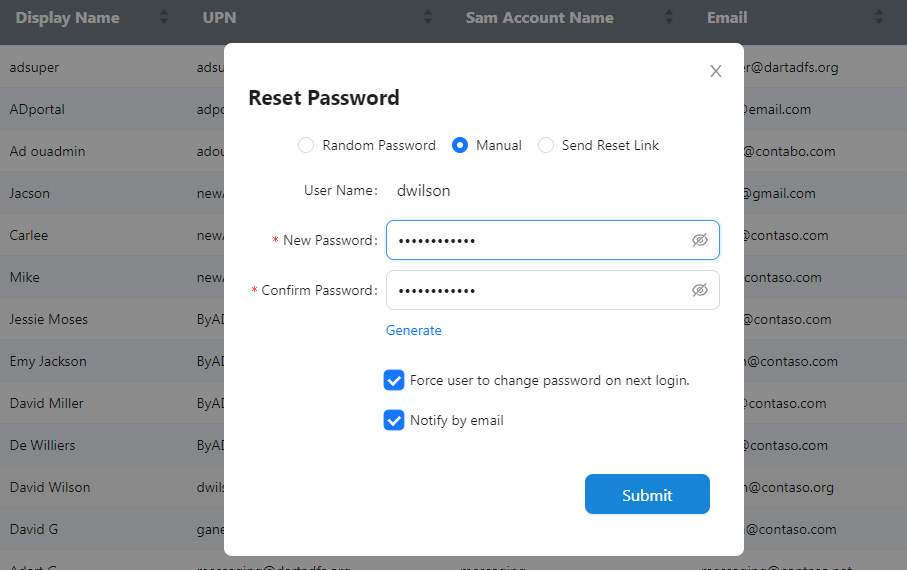
The manual option allows you to enter your own password or use the Auto Generate option. This is good when you want to know the password.
Send Reset Link (Method 3)
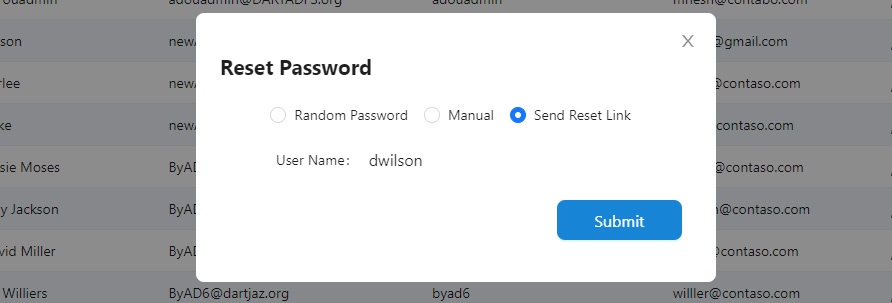
This is a simplest and automated way where it sends a random generated link which user can use to reset with his own password. By default the link will expire in a day which can be adjusted at Admin >> Settings
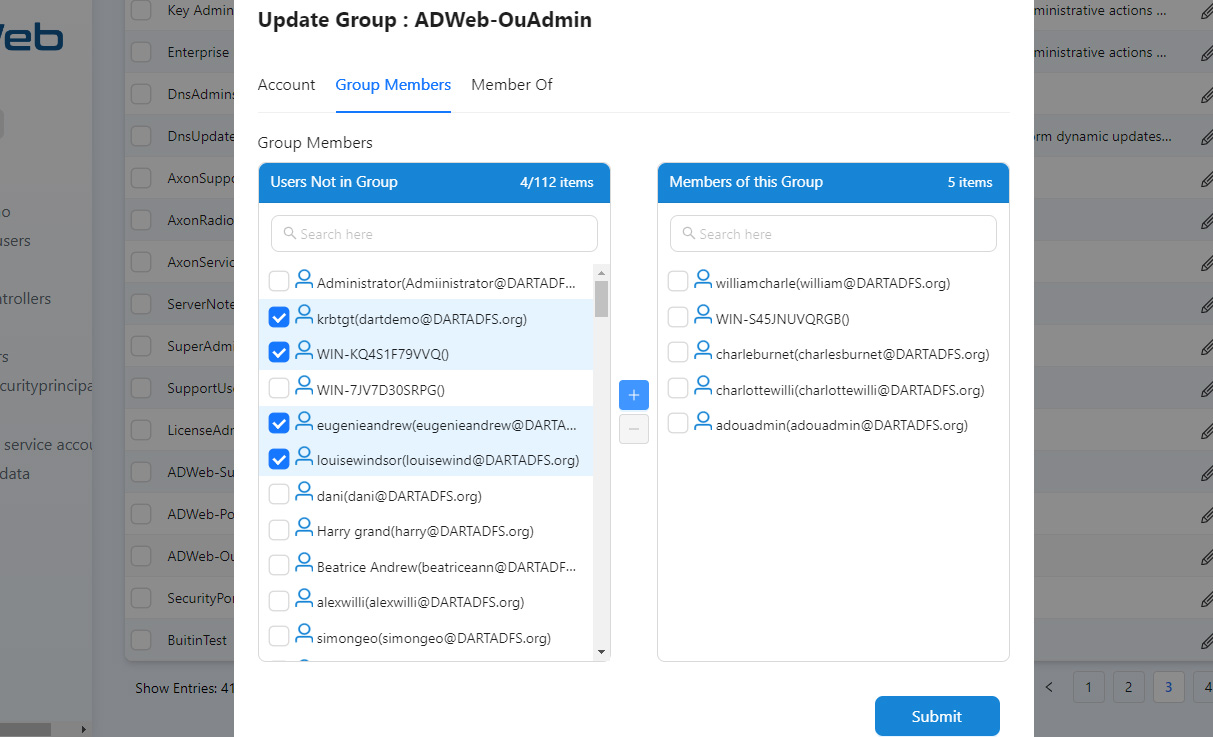
Search:
The groups tab allows you to Add/Edit/Delete groups of Active Directory. You can also add or remove multiple members to the group at one single click. The Members of Tab also functions the same way.
Organizational Units (OUs)
You can add, edit or delete any OUs from this tab. You can set protect or unprotect the OUs from accidental deletion like you do with Active Directory native console.
Export Records
The option is available at top right of the grid which can used to export users, groups and OUs at a single click. It will produce data in excel format.
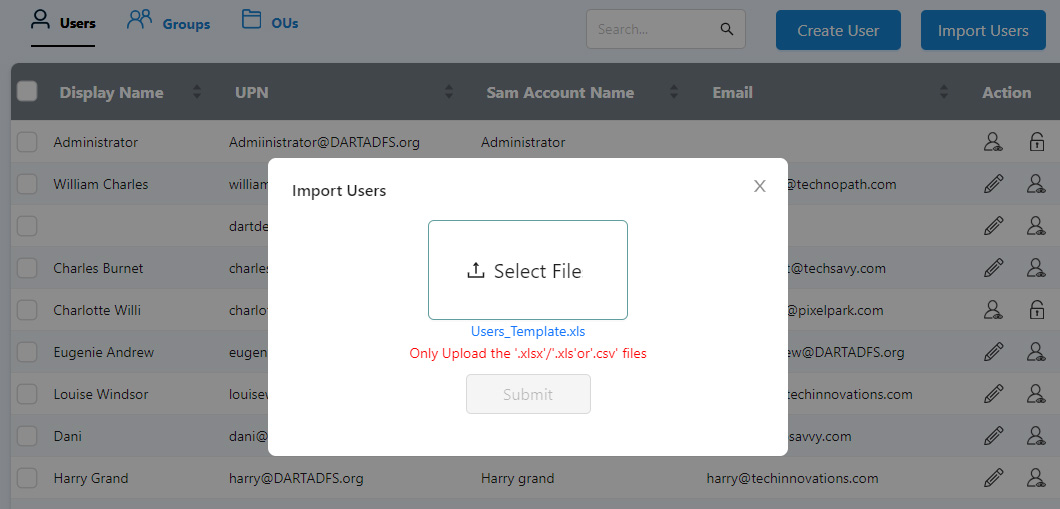
Import Users
It allows you to create Active Directory users in a bulk using an excel or csv file. It provides sample template which you can use to populate the new users data before for import.
Bulk Action
This is a great feature which allows you to perform an action against multiple users or all users at one time.