EndPoints:
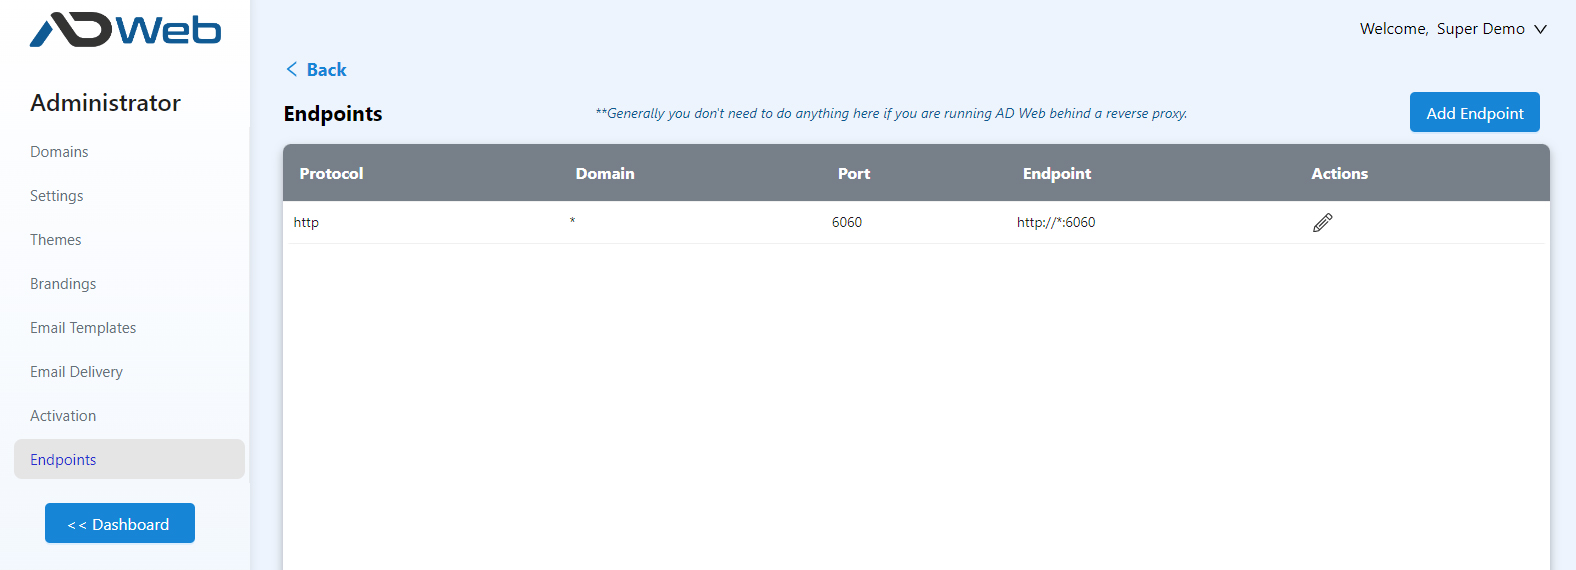
- You can add as many as you need from Admin >> Endpoints menu.

By default you will see only one endpoint which is the default one and can’t be deleted. However you can edit and change the port or host as you need. For example if you want your AD Web to run at port 80 you can do so. If you are going to run behind a reverse proxy then you can just go with the default port itself. However that’s up to you.
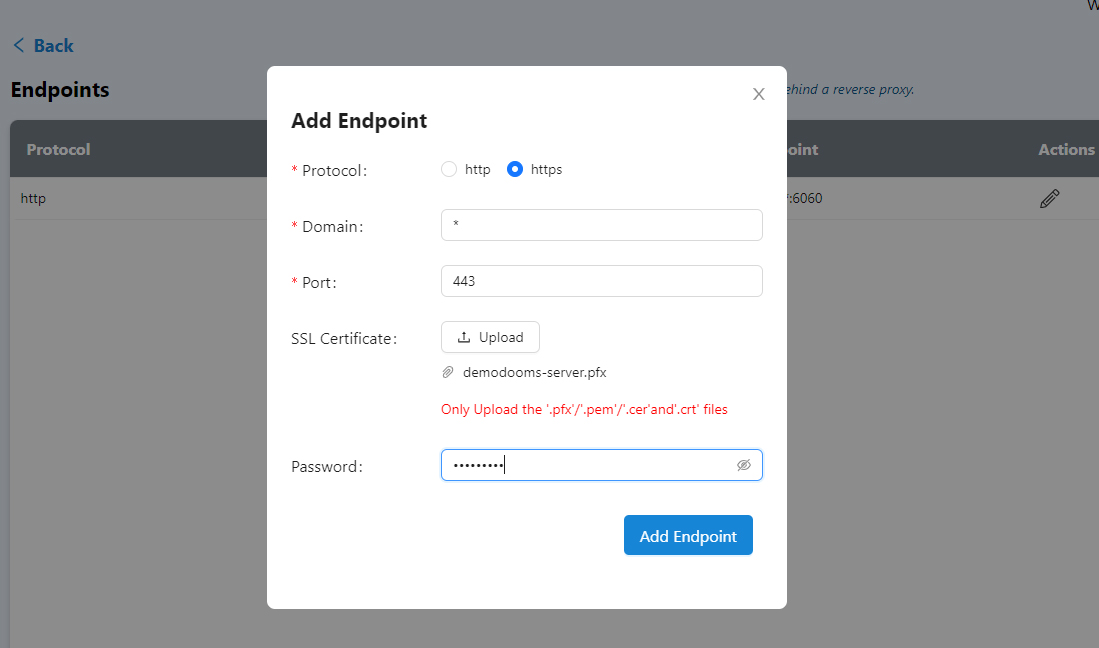
- To add a new endpoint click Add Endpoint button at top of the list. In below example, I will be adding an https endpoint by selecting the https option.

Domain: if you want to listen your AD Web on all IPs/hosts then place a wild card. This way you cn access your AD Web using localhost, local IP, public IP and any hostname pointing to the system IP. If you want AD Web to listen only to a specific IP or host then add accordingly. For example, localhost.
Port: You can specify the port that this endpoint needs to listen.
SSL Certificate: when adding a https endpoint SSL Certificate is must. You can upload your certificate and place the Password (if required) under the Password box.
Once added your AD Web can be accessed using the new endpoint URL. You can add/edit/delete endpoints at any time and there is no limit for endpoint addition.
Best Practices:
Running behind Reverse Proxy:
If you are going to run behind a reverse proxy then just leave the default one or just change the port to anything as you prefer. In this case you don’t need to add an endpoint with port 80 or a https endpoint with port 443. Generally it is good to use different port when running behind the reverse proxy.
Running AD Web publicly:
If you are planning to run AD Web directly using public URLs with standard ports then place an endpoint for http with port 80 and https with port 443. You may have multiple URLs for accessing your AD Web where you just need change your DNS records to point your AD Web system.
