AD Web Setup
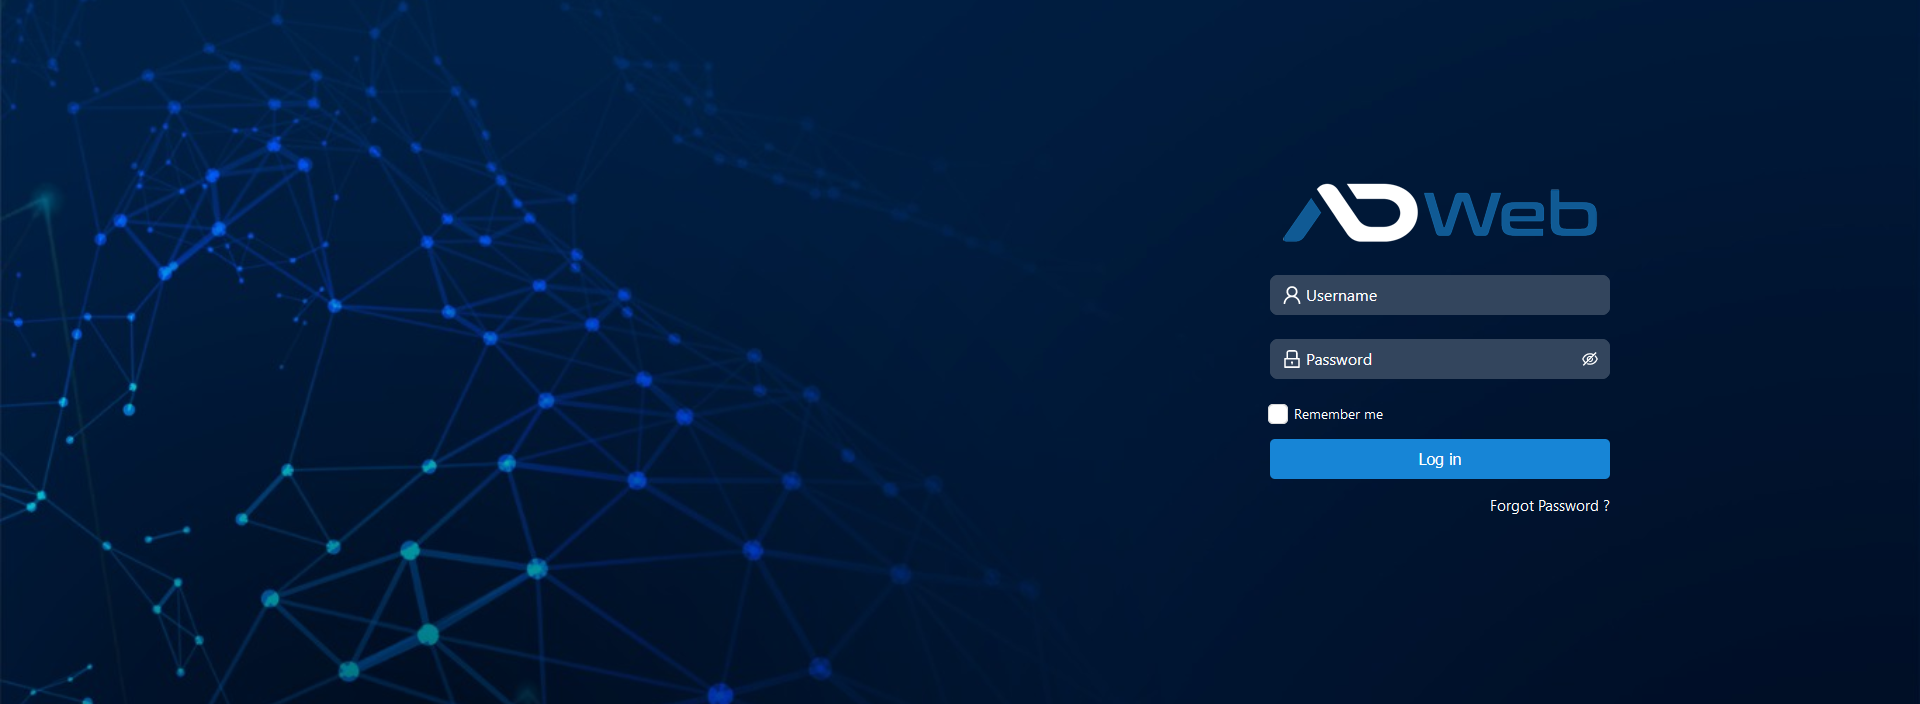
You will be landing at setup page on your first time visit of AD Web (http://localhost:6060)
Configure your Primary domain
By default, setup will land at primary domain configuration page. This is a must to do step hence setup your primary domain here, you can always switch your primary domain later.
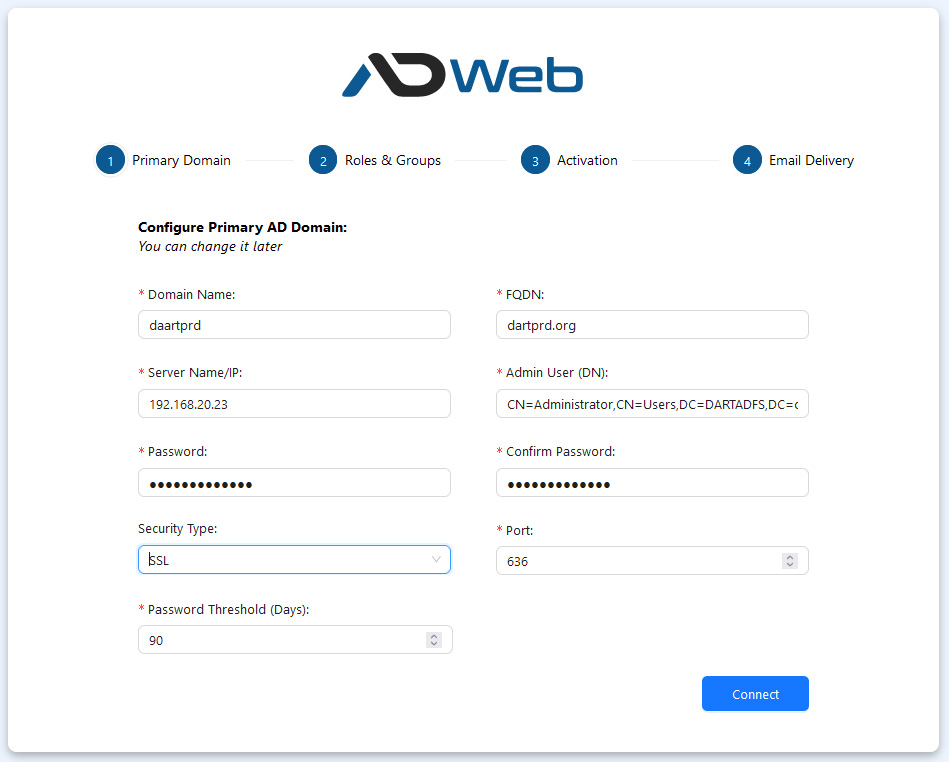
- You need to use SSL or TLS and otherwise your password resets and few other features won’t work properly.
- If you have any questions finding the Distinguished Name (DN), refer this article https://custominterfacesolutions.com/how-to-get-the-distinguished-name-of-a-user-ou-or-group/
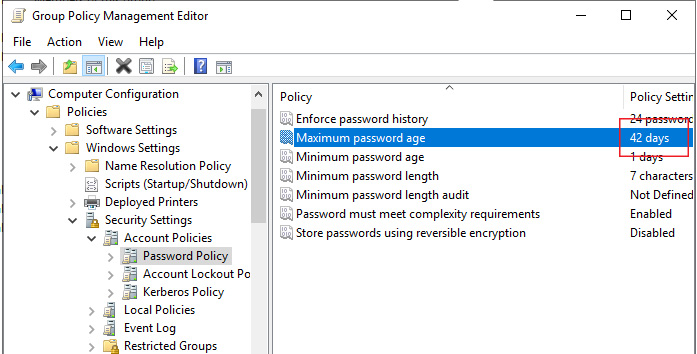
- Maximum Password Age is something you need to set exactly as in your AD Group Policy Management. You need it to show the Password expiration notification accurately. It is called Maximum Password Age. Refer the screen below. (you may set this later as well)
- Once all done Click Connect to Move Forward.
Configure Roles & Groups
You have to map your AD Groups to the AD Web Roles. You may do the rest of groups later but configuring Super Admin Group is a must one at this step. You will get all your AD Groups into the dropdown, simply select the preferred one.
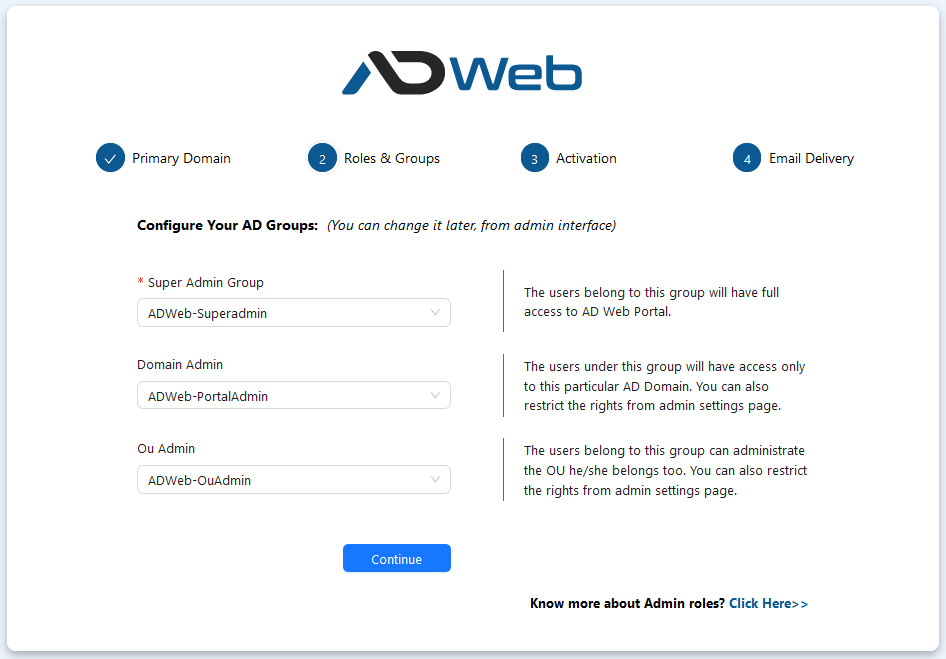
Super Admin Group
A top level admin who will have access to all your Active Directory domains you add under AD Web. He can manage everything without any restrictions.
Domain Admin
The users belong to this group will have access only to this particular Active Directory domain. Super Admin can always enable/disable access from the Admin backend. This will be discussed later in this guide.
OU Admin
If a user is under this group he can able administrate the other users under the same OU. This is useful when you want to allow department admins or client admins to manage their users themselves. Again as a super admin you can manage the access rights from your admin portal.
Click Continue to move forward.
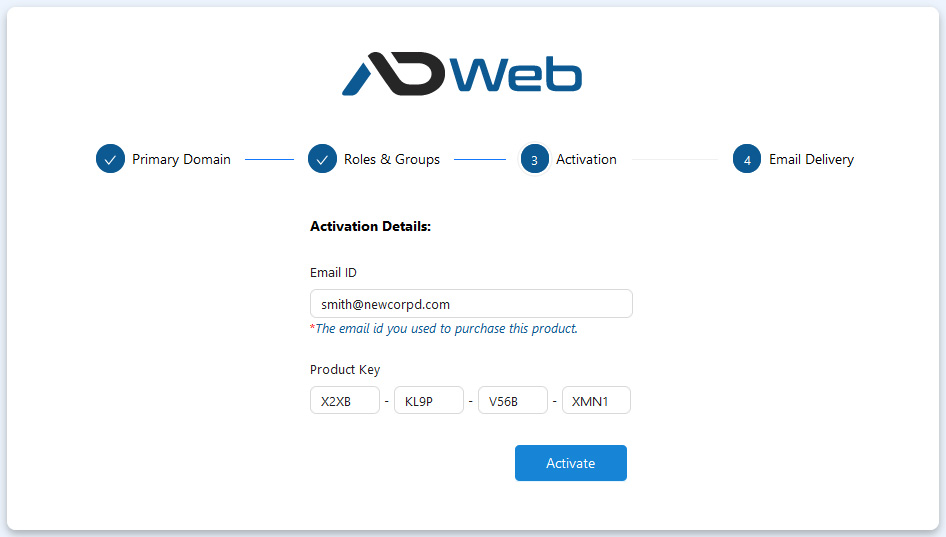
Activate your Product
Activate AD Web using the product key you received upon purchase. You need to use the exact email id you used during your purchase.
That’s all, you are done. The next step is optional at the moment and you can configure later as well.
Email Delivery
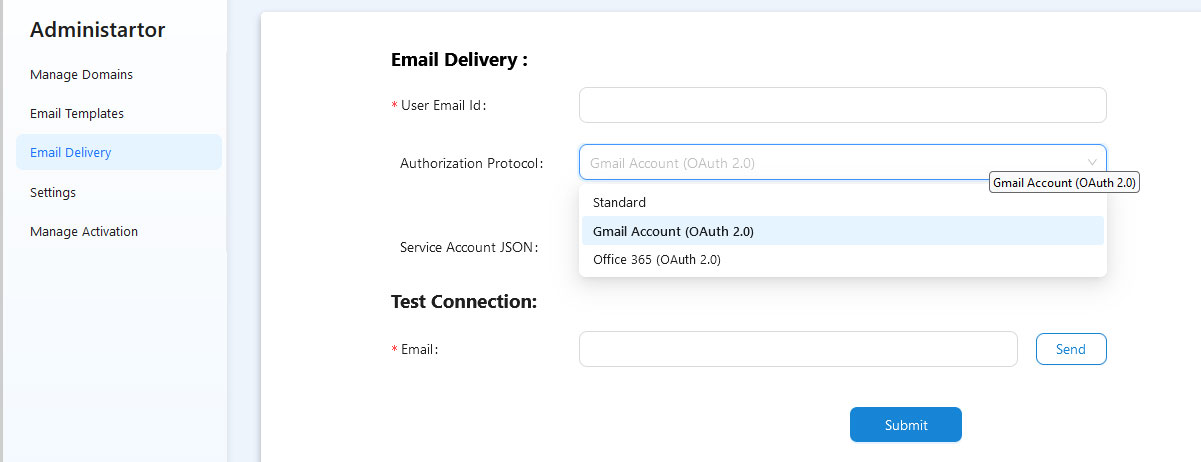
As told above this is optional and you can configure later. So either do it now or Click Skip For Now to move on to login.
Let’s login and explore as a super admin